
Aperty: How to use Sharpen tool
Oct 01, 2024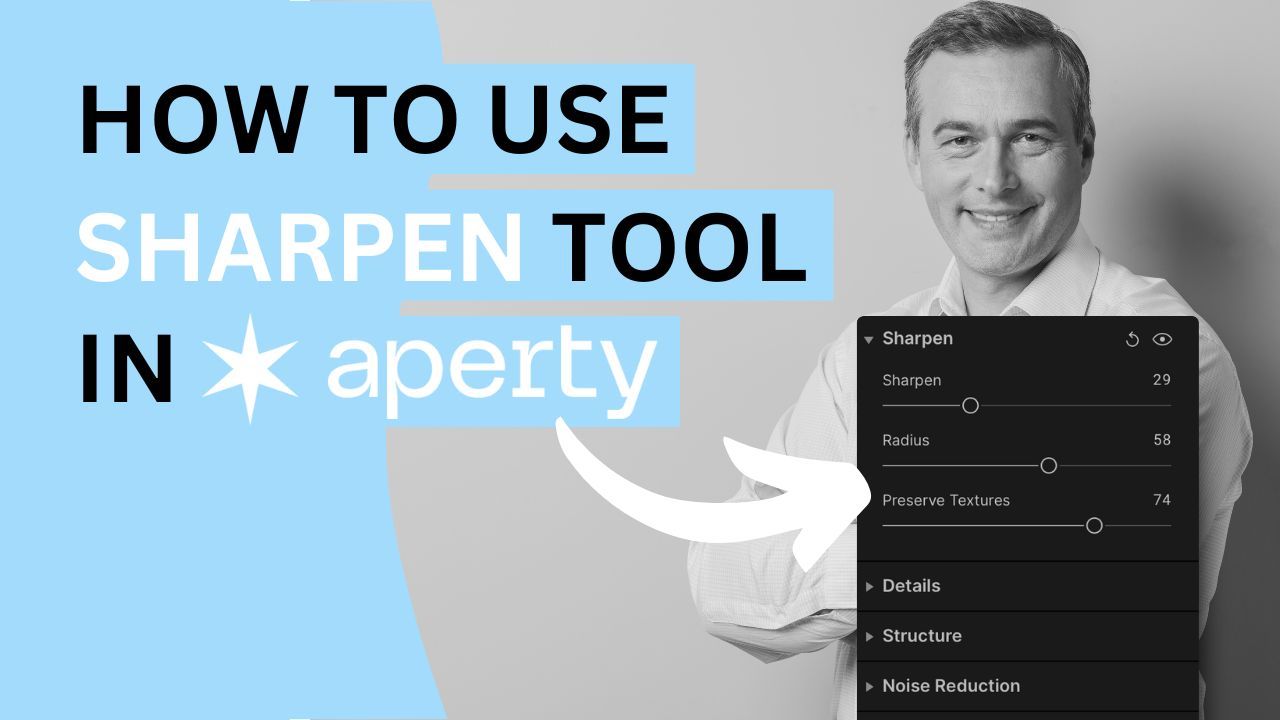
The Sharpening tool in Aperty is your go-to feature for enhancing portrait clarity and detail. By defining edges and accentuating textures, this tool makes features like eyes and hair pop, transforming ordinary images into stunning works of art. With just a few adjustments, you can elevate your portraits, adding depth and dimension that captivates viewers.
🎓 Learn everything there is to know about Aperty with our Aperty Masterclass 👉 Learn More
🛒 TIP: Speed up your portrait editing with our Professional Portrait LUT Bundle - Learn More
📸 Aperty: Find out more about Aperty 👉 Here
In this article:
- What is the Sharpen Tool
- Introducing Sharpen Tool controllers
- Getting started with the Sharpen tool
- Aperty
What is the Sharpen Tool
The Sharpening tool in Aperty is designed to enhance clarity and detail in portrait images, making it essential for photographers seeking striking results. By precisely adjusting the sharpness of edges, this tool defines key features like the eyes, lips, and hair. Increasing edge definition emphasizes textures and subtle details, allowing viewers to appreciate the nuances of the portrait. It can highlight intricate clothing patterns or the soft contours of a face, adding depth and dimension to your images. Whether editing close-ups or full-body shots, the Sharpening tool helps bring out the best in your subjects, transforming ordinary portraits into extraordinary ones with crisp, clear details.
Introducing Sharpen controllers
Amount Slider
Controls the strength of the sharpening effect. Increasing this makes your portrait sharper.
Radius Slider
Adjusts the width of the sharpening effect around the edges. A larger radius affects a broader area, while a smaller radius focuses on precise details.
Preserve Textures Slider
Lets you select which parts of the image to sharpen. Moving this slider to the right reduces sharpening on smooth areas, like skin, helping to prevent noise.
Getting Started with the Sharpen Tool
- Select your project in the Project Manager and double-click to open it in the Editing module.
- Choose the image you want to edit from the Film Strip at the bottom of the application.
- Navigate to the Main Editing Toolbar and click the icon with three sliders to access the Essentials section.
- Open the Sharpen tool by clicking its name or the triangle next to it.
- Adjust the Amount slider to control the level of sharpening in the image.
- Depending on the desired effect, adjust the Radius slider for more or less of the sharpening effect.
- Adjust the sharpening areas using the Preserve Textures slider.
- Optionally, use the Masking tool to apply the effect selectively to specific parts of the image.
- At any point, click the Eye icon to compare the before and after results.
Aperty Portrait Editor
Aperty is an advanced portrait photo editing software designed to simplify and accelerate the process of retouching portraits. It features AI-powered tools for tasks like blemish removal, skin smoothing, makeup application, and facial reshaping, all while maintaining natural beauty. With its user-friendly interface, batch editing capabilities, and support for plug-ins, Aperty allows photographers to achieve professional-quality results quickly. Developed in collaboration with photographer Julia Trotti, Aperty offers one-click presets, precise human detection, and automation, making it an efficient solution for high-volume portrait editing workflows.
Learn more about Aperty here.
Get professional portrait LUTs here.

