
How To Use Brush - Lightroom

The adjustment brush is a great way to enhance your photos and bring attention to certain areas of your photos. If you aren’t familiar with using this popular and powerful tool, wait until you see everything it can do!
In this blog post, we will answer the most frequent questions our customers have regarding Lightroom brushes.
- What are Lightroom brushes
- How to add brushes into Lightroom
- How to use Lightroom adjustment brushes
- What are adjustment brush presets

1. What Are Lightroom Brushes?
The Adjustment Brush in Lightroom is a tool that allows you to make adjustments to only certain areas of an image by “painting” it where you want it. As you know, in the Develop module, you adjust the sliders in the right-hand panel to make adjustments to the entire image. However, by using the Adjustment Brush, you can make selective adjustments to only the areas of the image that you choose.
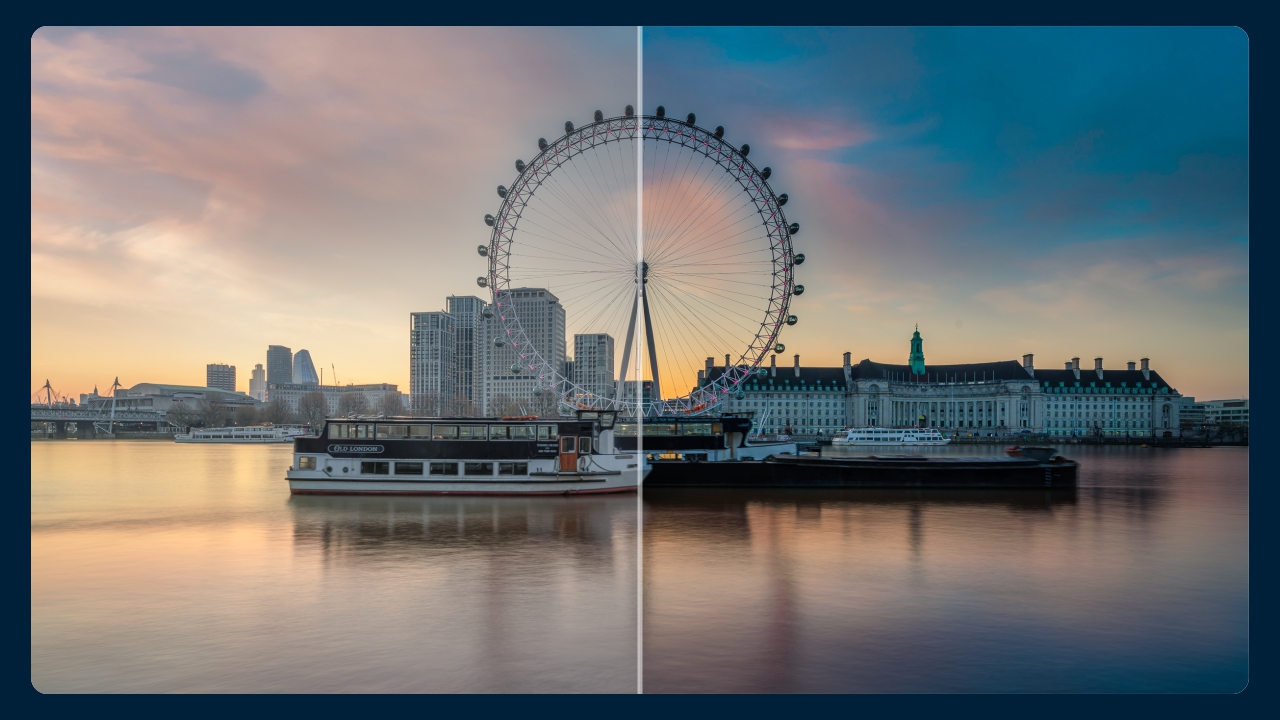
The most basic example of adjustment brush technique is called "Dodge & Burn". The idea comes from the traditional darkroom technique where the photographer lightens an area on the print (dodging) or increases exposure to darken areas on a print (burning). We can easily recreate this by using the Lightroom brush by simply increasing or decreasing the exposure and painting in desired areas.
2. How To Add Brushes Into Lightroom
The Adjustment Brush is automatically included as a part of the local adjustment tools of Adobe Lightroom. The local adjustment tools including the brush tool, radial filter and graduated filter.
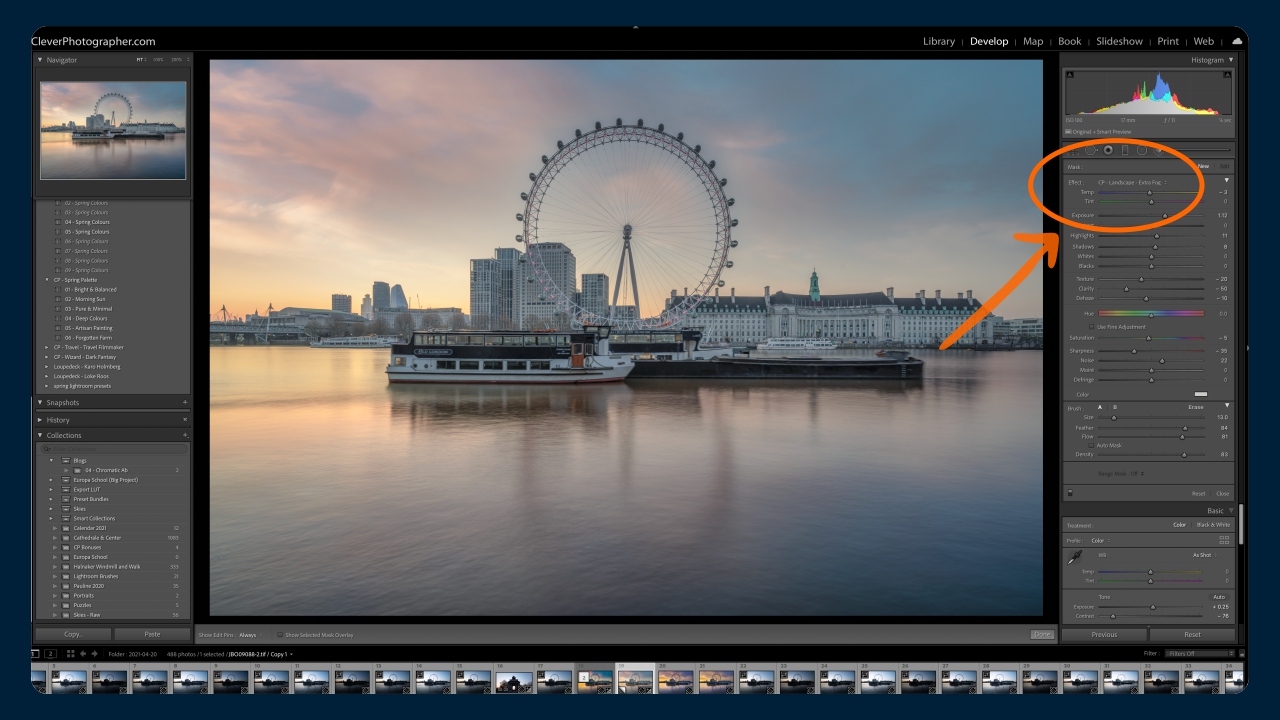
When it comes to adjustment brush presets, Lightroom does have 18 presets available in the application. These simple presets including adjustments like exposure, tint, contrast and temperature. We can access the brush presets at the top of the brush effect toolbar next to the "Effect" sign.
If you are ready to move on from the default Lightroom brush presets, we have an excellent brush bundle available here.
To add the brushes (brush presets) into Lightroom, follow the steps below:
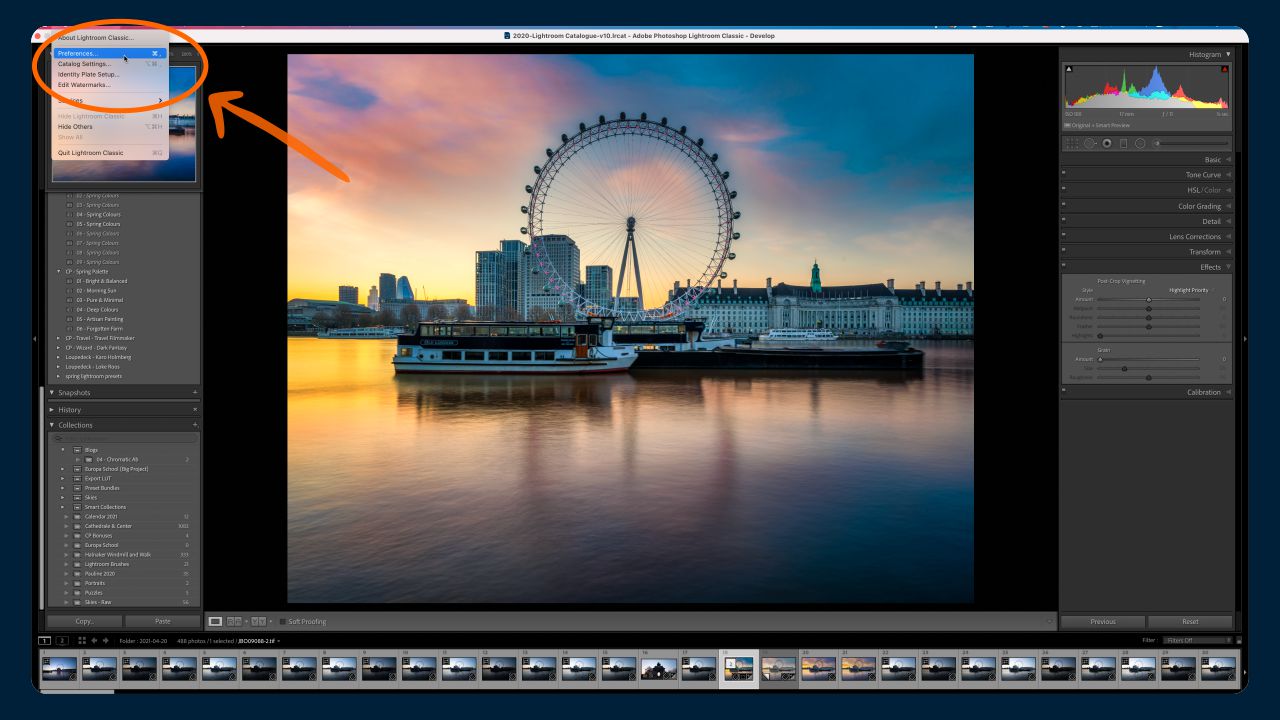
Step 1: OPEN LIGHTROOM & NAVIGATE TO PREFERENCES
On a PC, open Lightroom and click on Edit at the top (next to File), then click on Preferences in the drop-down menu.
On a Mac, open Lightroom and click on Lightroom at the top (to the left of File), then click on Preferences in the drop-down menu.
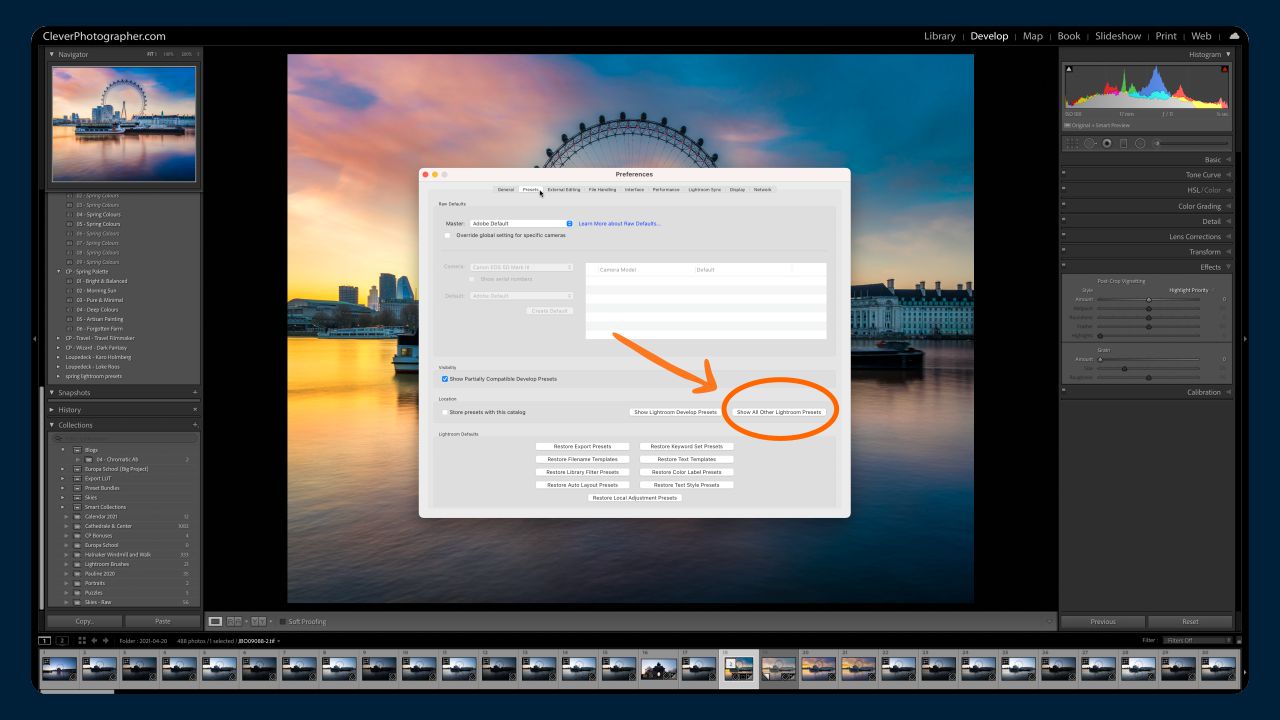
Step 2: CLICK ON THE PRESET TAB
When your Preferences box opens, there will be several tabs at the top; click on the Presets tab (second tab over).
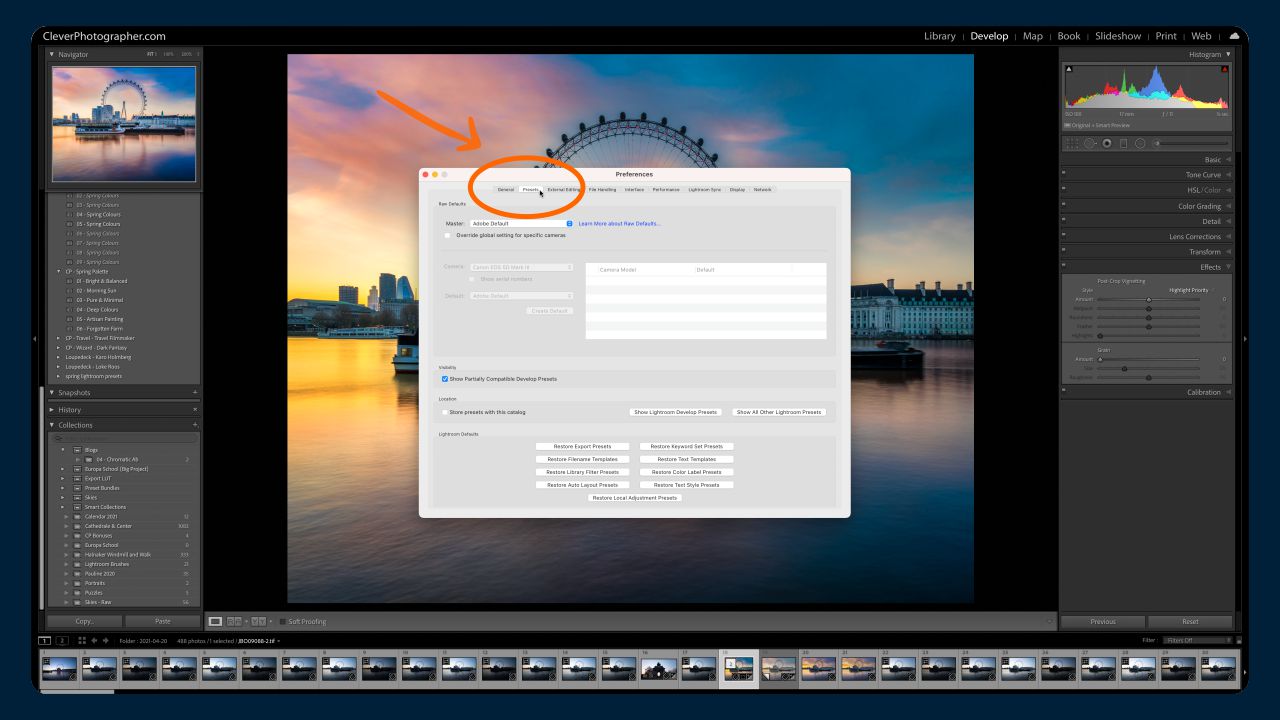
Step 3: CLICK ON "SHOW ALL OTHER LIGHTROOM PRESETS" BUTTON
Next, click on the box titled "Show All Other Lightroom Presets" button for the most current versions of Lightroom or click on “Show Lightroom Presets Folder" if you have an older version of Lightroom.
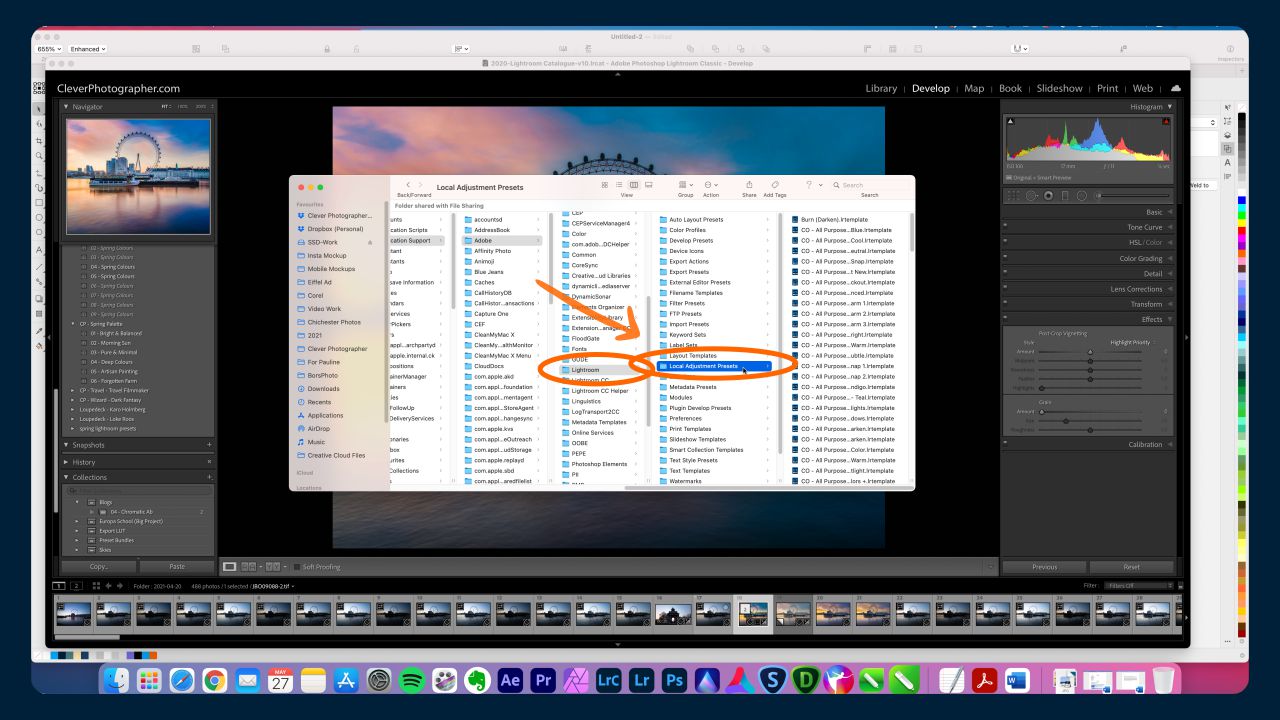
Step 4: OPEN THE LIGHTROOM FOLDER & LOCAL ADJUSTMENT PRESETS FOLDER
When the next box opens, double click on the "Lightroom" folder and then double click on the "Local Adjustment Presets" folder.
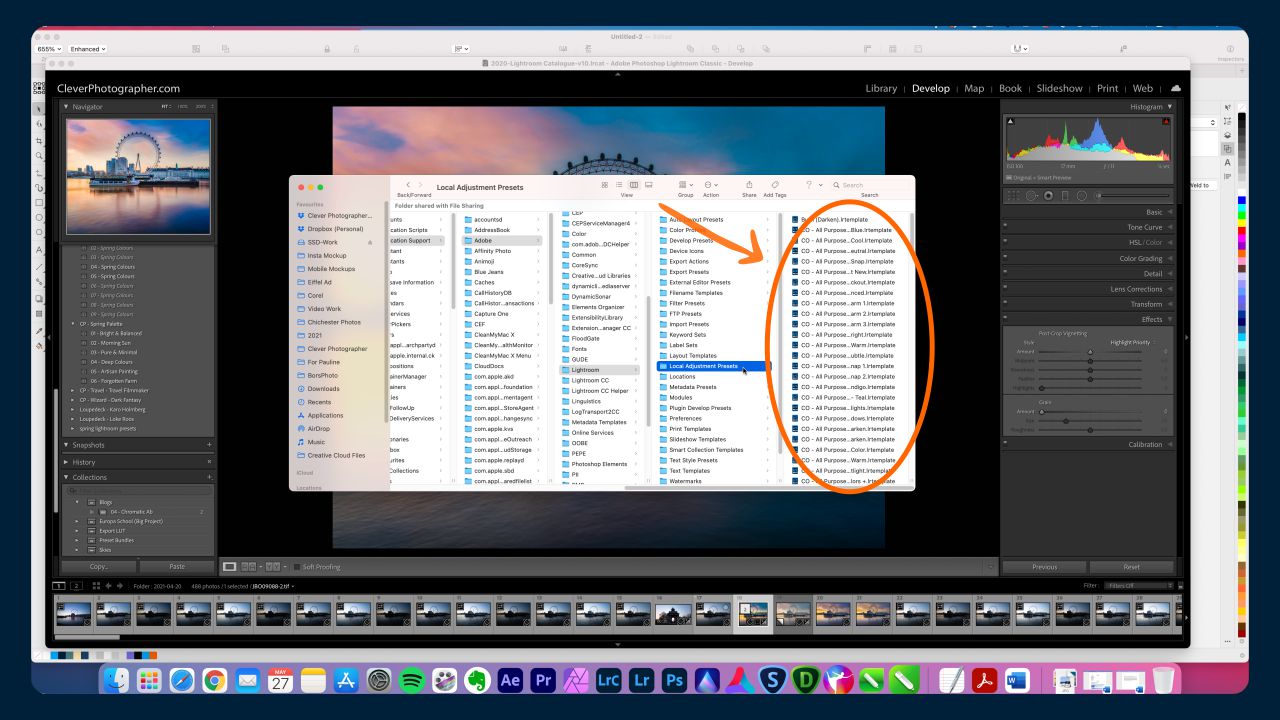
Step 5: COPY BRUSHES TO THE LOCAL ADJUSTMENT PRESETS FOLDER
Finally, copy the Lightroom Brushes (.lrtemplate files) from the location you downloaded them to your computer and paste them into the “Local Adjustment Presets” folder.
Step 6: RESTART LIGHTROOM
Close Lightroom and restart it. You're done!
Still not sure? Visit our blog post covering the Troubleshooting of Lightroom brushes here.
3. How To Use Lightroom Adjustment Brushes
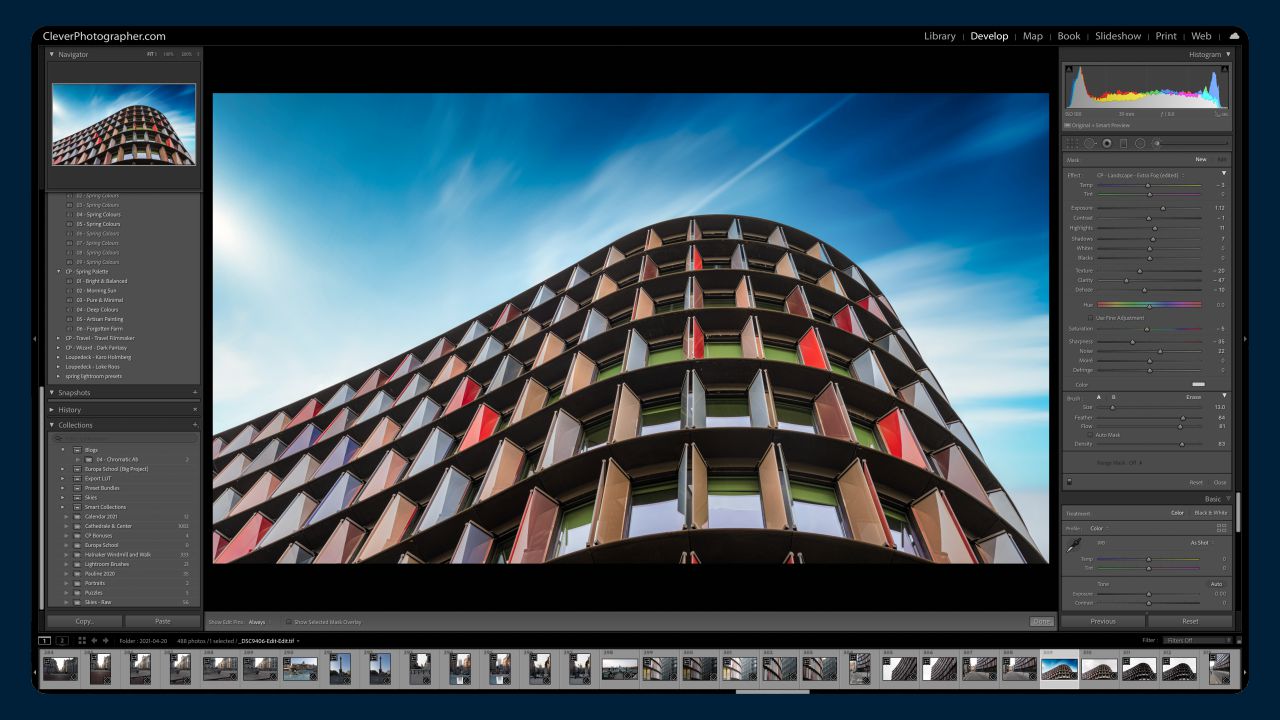
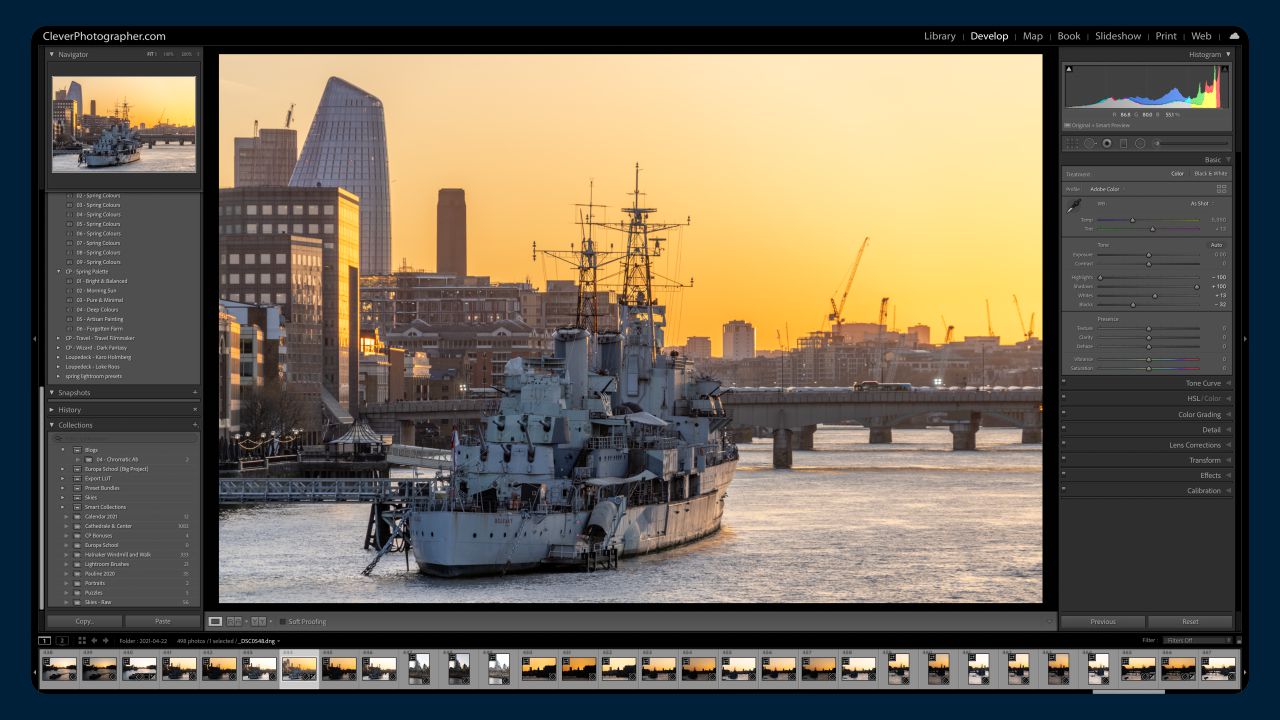
You can find the Adjustment Brush icon in the Develop module below the Histogram and above the Basic panel on the far right. To use it, either use the keyboard shortcut ‘K’ or click on the icon, and your effects options will be revealed.
Once you select what adjustments you would like to make, take your brush (indicated by a circle with a + in the centre) and brush over the areas of your image that you would like to edit. When you are finished, click “Done” in the lower right-hand corner of the preview window.
Seeing Where You’ve Brushed: If you would like to see where you have brushed your adjustments on your photo, make sure that the Lightroom adjustment brush that you wish to view is selected (the pin for that brush has a black centre), and check the box under your photo that says “Show Selected Mask Overlay.” This will show you in red all of the photo areas that have been adjusted with that particular brush.
Changing Brush Size: There are several ways to change the size of your brush:
- Use the slider under the brush settings
- Scroll the wheel on your mouse up or down
- Use the left and right bracket keys ( [ ] )
Using a New Brush: Each time you want to start using a new brush (a different adjustment), you will need to “pick up” a new brush. To do so, select “New” at the top of the Adjustment Brush panel. You will notice that all of the sliders remain in place from the previous brush. To reset them, double click “Effect” to reset all sliders or select a new brush preset from the drop-down menu.
How to Erase: If you accidentally brush over an area where you don’t want your adjustment to be back, there is an easy way to correct it. Click Erase, OR click Option (Mac) or Alt (PC) and you will see that your brush now contains a minus sign, and will erase from any area you brush it over. To delete a brush you’ve added to your image entirely, make sure that Brush is highlighted (pin has black centre) and hit Delete.
Brush with Color: If you’re looking to enhance a specific colour on your image, you can select a colour at the bottom of the brush panel to use within your adjustment brush. This is a great way to add some extra colour to enhance eyes, a landscape or even certain colours within a photo!
4. What Are Adjustment Brush Presets
Adjustment Brush presets are pre-saved brush settings that allow you to quickly and easily make certain adjustments to your image. You can access these adjustment brush presets using the drop-down menu in the adjustment panel (note that these are different from the Presets in your left panel that affect your entire image).
Lightroom has several presets built-in for you, but our favourites are the Signature
Lightroom Brushes, an adjustment brush collection specifically designed to easily retouching your landscapes, portraits and black and white photos. Find out more about them here.

Free Guide to Lightroom
Lightroom is not a difficult program to learn for beginners, and even with limited experience, you can drastically improve the look of a photo with the most basic Lightroom adjustments. Get our free Complete Guide to Lightroom (Here) and speed up the learning process to start pushing your skills forward today.
The End
That's it for today, but if you need any help, make sure to contact us directly, and we will do our best to help.
#StaySafe - Jakub Bors
@CleverPhotographer | @BorsPhotography

