
How to use the Luminar for iPad
Luminar for iPad emerges as a groundbreaking AI-powered photo editing application tailored exclusively for Apple iPad and Apple Vision Pro. Crafted by Skylum, the innovative minds behind the acclaimed Luminar and Aurora HDR series, this app seamlessly integrates some of the most sought-after tools from Luminar NEO, empowering photographers to wield them on their mobile devices.
With its user-friendly interface, Luminar for iPad offers an effortlessly immersive editing experience, allowing photographers to refine their images with ease anytime, anywhere. Say hello to unparalleled editing convenience and embrace a new era of mobile creativity with Luminar for iPad.
📸 Download the application here: https://skylum.evyy.net/c/
📖 Get ULTIMATE GUIDE for Luminar for iPad here: https://www.cleverphotographer.com/luminarforipad
In this article:
- What is Luminar for iPad
- How to get the Luminar for iPad
- What platform and devices are supported by Luminar for iPad
- Introducing the Luminar for iPad Tools
- How to use L
What is Luminar for iPad
Luminar for iPad stands as a pinnacle of mobile photo editing, meticulously crafted by Skylum Software. This powerful application, enriched with artificial intelligence, caters specifically to Apple iPad and Apple Vision Pro users. With its arsenal of AI tools, Luminar transforms the mobile editing experience on larger screens, delivering faster workflows and impeccable results.
What sets Luminar apart is its seamless integration with the Apple ecosystem, offering iPad users effortless access to editing capabilities for their photos, whether snapped on their phones or iPads. Moreover, Luminar is fully compatible with the Apple Pencil, enhancing precision and control for discerning photographers.
Navigating through Luminar's intuitive interface feels like second nature, offering a user-friendly environment that fosters creativity anywhere, anytime.
Current version: 2.0.1
How to get the Luminar for iPad app
The app can be downloaded and installed from the App Store on iPad or Apple Vision Pro. You can try it for free for seven days before subscribing to one of the monthly plans available.
Luminar for iPad purchase options:
- 12 Months Subscription - $29.99 + 7 Day Trial
- 6 Months Subscription - $19.99
- 1 Month Subscription - $4.99
- Apple Vision Pro - Free access to the application until June 5th, 2024.
Additional information about the app:
- Direct download from the App Store: Here
- Luminar for iPad official website: Here
- Skylum official website: Here
- Skylum team website: Here
What platform and devices are supported by Luminar for iPad
The app is currently available for Apple iPad and Apple Vision Pro.
iPad Requirements:
The Luminar for iPad is available on all Apple iPads with iPadOS 17 and newer. Additionally, you will also need 450MB of space on your iPad.
Supported iPads: iPad 12.9-inch (2nd generation and later), iPad Pro 10.5-inch, iPad Pro 11-inch (1st generation and later), iPad Air (3rd generation and later), iPad (6th generation and later), iPad mini (5th generation and later)
File size restrictions: There are no restrictions for file sizes on iPads with 8GB Ram. If you have an iPad with 4-6GB Ram the restriction will be 8000px, while with 3GB Ram — 6000px on the longer side of the image.
How to find your iPadOS version:
- Open the iPad settings
- Select "General" tab
- Select the "About" tab
- Check your iPadOS version in the list.
Apple Vision Requirements:
All current Apple Vision Pro are supported with the application.
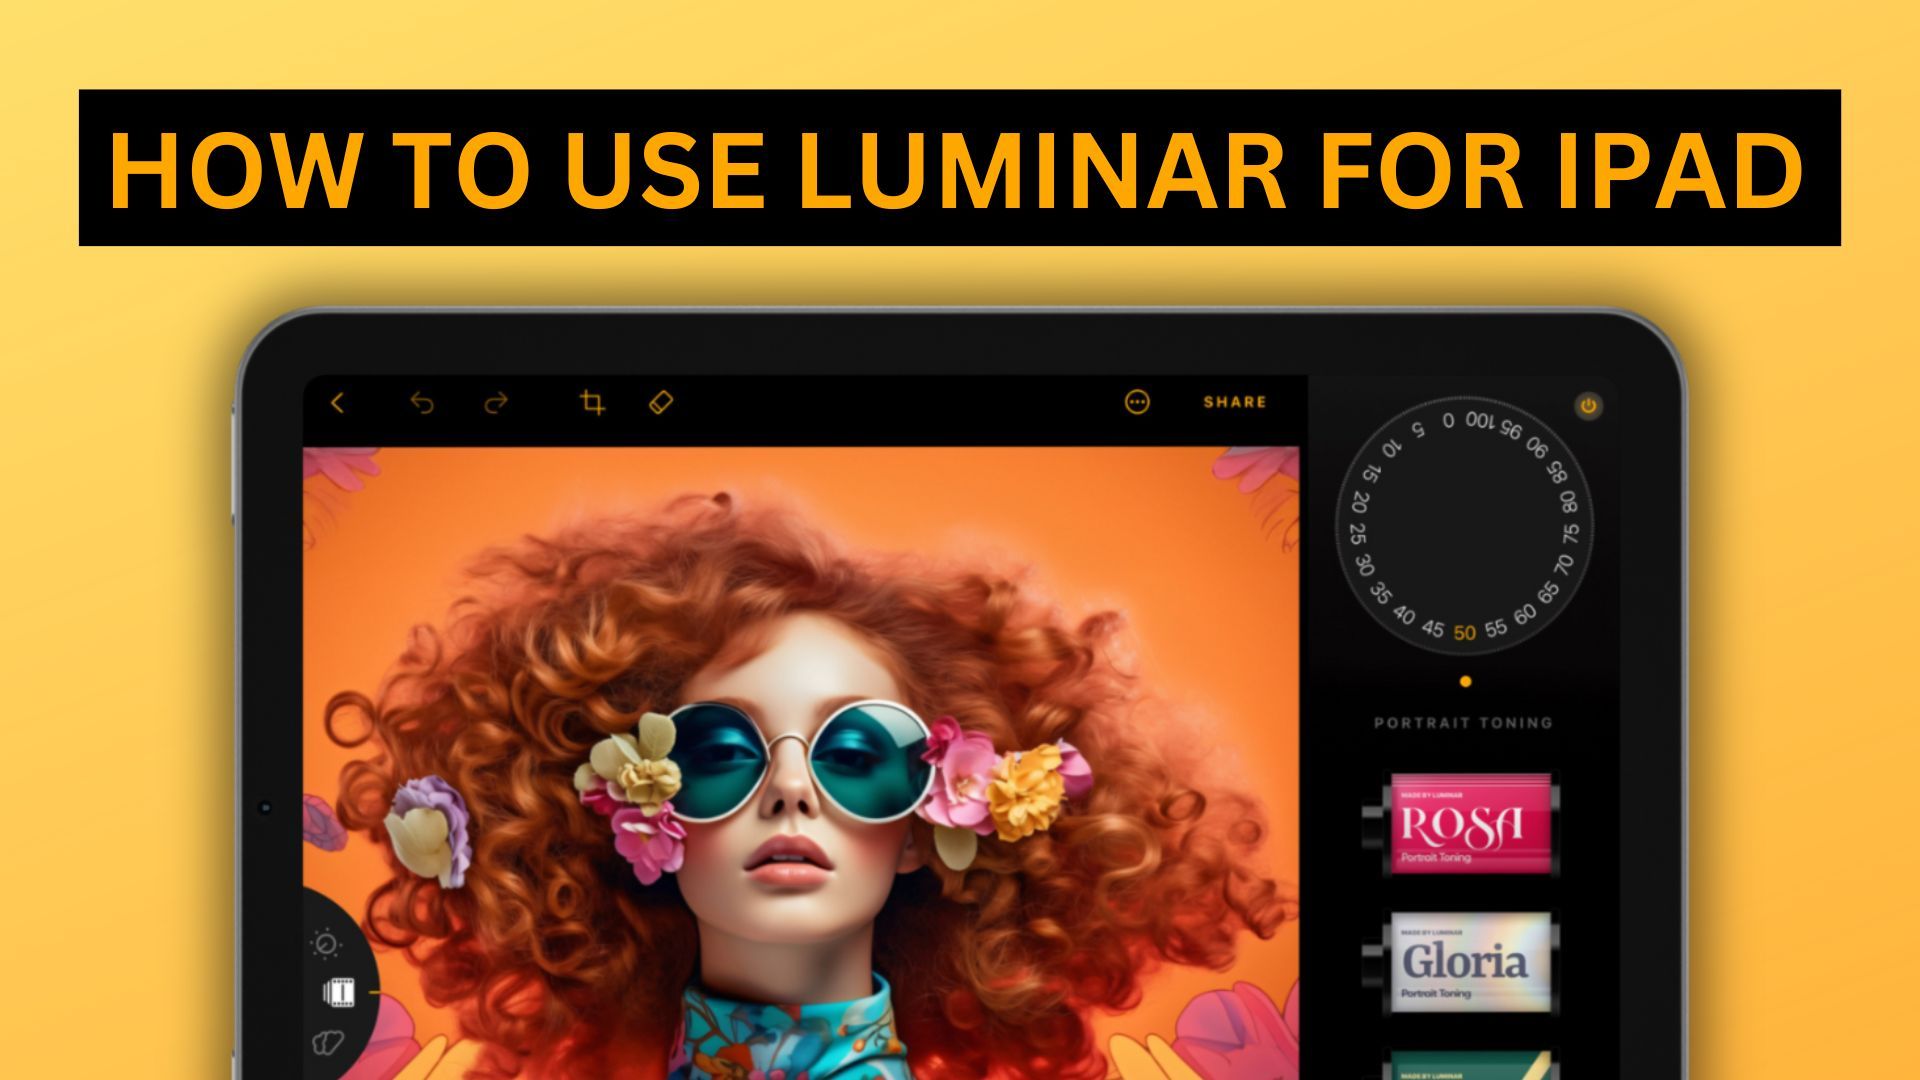
Introducing Luminar for iPad tools
Develop Tool
The Develop tool allows you to control the traditional development settings like Brightness, Contrast, Highlights, Shadows, Blacks, Whites and more. The controllers in the tool are smartly organised in the editing order where you can start from the top of the tool and work your way down.
Enhance AI Tool
EnhanceAI is a powerful tool that uses Artificial Intelligence to improve your photos. This tool can analyze your image automatically and make instant corrections while still giving you control over the final result. Using EnhanceAI can replace many traditional controls, such as shadows, highlights, contrast, tone, saturation, exposure, and details.
Structure AI Tool
The Structure AI is a powerful tool that enhances image contrast and reveals finer details. It uses AI to detect the content of the image, allowing for variable adjustments in different areas based on the subject. The tool also incorporates human awareness, which helps to maintain a natural appearance of the skin and face while enhancing the detailing of surrounding objects.
Relight AI Tool
The Relight AI has a unique feature of analyzing a photo in three dimensions. By creating a 3D map of the image, it can naturally spread light in 3D space across a 2D picture, resulting in superior photorealistic results. This tool is particularly helpful for photos that need an extra source of realistic light in the foreground.
Skin AI Tool
The SkinAI tool analyzes your image and can automatically enhance and retouch a person’s skin. You have complete control over how the content-aware adjustments are applied. Additionally, SkinAI can eliminate various skin imperfections, including acne, freckles, and moles. It can also smooth the skin while ensuring that small details like hair and eyelashes remain sharp.
Body AI Tool
The Body AI tool analyzes your image and can automatically enhance and retouch a person’s body, while giving you complete control over how the adjustments are applied. It allows for natural-looking body sculpting, helping to slim, reshape, and refine body contours without distorting the background. Whether you want subtle adjustments or more pronounced changes, Body AI offers a seamless way to achieve your desired look while maintaining the integrity of the original image.
Landscape Tool
The Landscape tools are purposefully tailored to enrich landscape photography but are equally effective for real estate, travel, and nature shots. This versatile tool enables enhancements for golden hour captures, foliage, and adding or removing haze/fog in your photos.
Details Tool
The Details Tool provides excellent control over showcasing details and textures in your images. Its key feature lies in the ability to selectively adjust detail and sharpening with precision, targeting various levels of detail across different-sized elements in your photo.
Curves Tool
Curves are very useful tools that can be used to adjust the brightness, contrast, color balance, and intensity of an image. While regular curves are mainly used to manipulate the overall brightness, color curves let you control each of the red, green, and blue color channels individually to achieve the desired effect.
Monochrome Tool
The Monochrome tool allows you to transform your colored images into black and white style. You can adjust the focus and contrast of the dominant color (blue, red, yellow, green, magenta, and blue) by moving the slider to the color's position. Essentially, the chosen color will have its luminance reduced by 50%, resulting in a darker appearance.
Sky Replacement Tool
The Sky Library lets you easily choose the sky you want to use for sky replacement. You'll find 30 pre-installed skies organized into eight categories based on weather conditions and time of day. You can also create a personalized "Favorites" category with your preferred skies. Additionally, you can import your own skies using the "Your Own Skies" feature, and these can also be added to your "Favorites" section. To access the Sky Replacement tool, use the toolbar wheel and select the cloud-like icon.
Photo Filters
The Photo Filters tool is a powerful feature that lets you alter the appearance of your photos using professional lookup tables (LUTs). With a vast library of pre-built LUTs and complete control over the intensity of the effect you want to apply, you can easily create an endless variety of looks for your photos. To access the Photo Filters, use the toolbar wheel and select the film-like icon.
Erase Tool
The Crop tool is a powerful feature that lets you transform your photo in a variety of ways. You can use it to crop, rotate, flip, and align your photo. The best part is that the tool is non-destructive, meaning that you can easily apply and edit it at any point during the editing process. Additionally, the tool includes an Undo and Redo option, allowing you to make changes to the editing steps you have already applied. To access the Crop Tool, tap the crop icon on the top-left side of the editing window. When you finished using the Crop tool, tap on the Done or Cancel buttons on the screen's top left and right sides.
Crop & Transform Tool
The Erase tool is a helpful feature that can help you remove any unwanted objects from your photos. You can access this tool by clicking on the erase icon located in the top-left corner of the editing window. With this feature, you can easily adjust the size of the erase brush to suit your needs and then proceed to brush with your thumb over the areas you wish to remove. Additionally, the brush tool comes equipped with simple undo/redo buttons that can be used to correct any adjustments if needed. When you finished using the Crop tool, tap on the Done or Cancel buttons on the screen's top left and right sides.
Getting started with the Luminar for iPad app
The Luminar for iPad app offers simple and intuitive controls, so most tools are controlled with sliders or buttons.
TIP 👍: To reset any controller, double-tap on it.
Photo Gallery
The Gallery module is the first window you'll see when you open the application. It allows you to select an image and move it to the Editing module for any necessary changes. The view is similar to that of the Apple Photo app on your iPad, making navigating your photos easy. You can access all the photos and albums stored within your Apple Photos, and you can also add your own photos through the folder system on your iPad. Additionally, you can capture an image directly from the Gallery module and edit it immediately.
Open Image
Once you have opened the Photo Gallery, you can select your desired image by tapping on it.
The Luminar for iPad app supports the following file formats: JPEG, JPEG-2000, PNG, TIFF, DNG, PSD
File sizes are not restricted on iPads with 8GB RAM. If you have an iPad with 4-6GB RAM, the restriction will be 8000px on the longer side of the image, while with 3 GB RAM, it will be 6000px.
Editing Module
After selecting a photo in the Photo Gallery, you will be directed to the Editing Module. Here, you can edit your images using the main editing tools bar, sky replacement feature, and photography filters. Additionally, the editing module enables you to transform your image further using the Cropping and Erasing tools.
Editing Module
The menu currently offers three views: the traditional Edit menu, the Sky Replacement menu, and the Filters menu. To switch between these menus, use the wheel-shaped Menu Controller located at the lower left side of your screen. To switch, simply turn the controller by dragging it in the direction you want with your thumb.
Before & After
The app lets you view the before and after images by long tapping on the picture.
Zoom In & Out
To Zoom In, pinch the picture. To Zoom Out, pinch out. To reset the view, double-tap the image.
Export Image
You can export and share the final result by tapping the SHARE button in the top right corner of the menu. Once selected, the app will open the standard sharing window, and you can save or share your image from there.
The exported file will be in 8 Bits, sRGB, JPEG format with 300ppi resolution
Clever Photographer
Clever Photographer is an Official Partner of both Skylum and Luminar. We produce free video tutorials on our YouTube channel (here) and create digital assets and additional training for the Luminar NEO and Luminar Mobile community. You can find our Luminar NEO products on our website (here) and Skylum's marketplace (here). As a part of our commitment to this photo editing app, we also try to answer as many questions related to Luminar NEO as possible through our email and social media accounts.
