
How to Photograph Bluebells
May 07, 2021Bluebells are considered to be amongst the most beautiful of all the woodland wildflowers. However, photographing them can be a tricky business! Here is everything you are going to need to get you started with your bluebell photography.
Bluebell Photography Tips:
- Tip 1 - Time of the year (0:27)
- Tip 2 - Photography gear (1:29)
- Tip 3 - Time of the day (6:15)
- Tip 4 - Composition (7:44)
- Tip 5 - Final tips (10:37)

Tip 1 - Time of the year (0:27)
When it comes to bluebells, timing is everything. April and May are the ideal times to photograph bluebells in the UK, so now is the time to start thinking about visiting your local wooded areas to capture the brilliant carpets of blue that will spring up around the forest floor.
If you’re a UK resident, it shouldn’t be hard to find an area sprouting bluebells – half of the world’s bluebell population is found here. The following map will give you a good starting point when searching for your nearest bluebell location.
It's important to remember that each area will tend to have a particular time when the bluebells are at their peak. If you really want to shoot bluebells, make sure you research your location and get there in time; otherwise, the vivid blue will be quickly replaced by standard green.
Tip 2 - Photography gear (1:29)
The most obvious lens to use when shooting bluebells is a standard lens, such as a 50mm, which will emphasise the scene's scope. A wide-angle optic will expand the landscape, push the background further into the distance and give the image depth, making the scene much more immersive.
If your standard lens means you’re losing the impact of the bluebell carpet, then it’s worth switching to a telephoto lens like a 24-240mm. This will compress the scene, push the bluebells closer together and make the carpet appear as if it is thicker. This will also bring the background trees forward and act as a solid backdrop for your bluebells.
You can also try to experiment with a wider lens and while this can often benefit the scene, beware that it can also mean that the bluebell carpet looks more spread out than it is in reality, and you risk losing the wow factor the thick bed of bluebells.
Sweeping images of bluebell carpets are trendy, but it’s always worth getting a closer look at the individual flowers. This can be particularly effective just after rainfall as attractive beads of water cling to the blue petals.
This is a great tool to use when shooting bluebells. Putting a polariser on your lens will reduce the glare on the leaves – which results from moisture and the sun – and will reveal the stunning blues and greens of a location.
You’ll often be shooting bluebells in the shade of the tree canopy, so it’s important to carry a tripod and, if you have one, a cable release/wireless remote. You can then avoid the risk of camera shake.
Tip 3 - Time of the day (6:15)
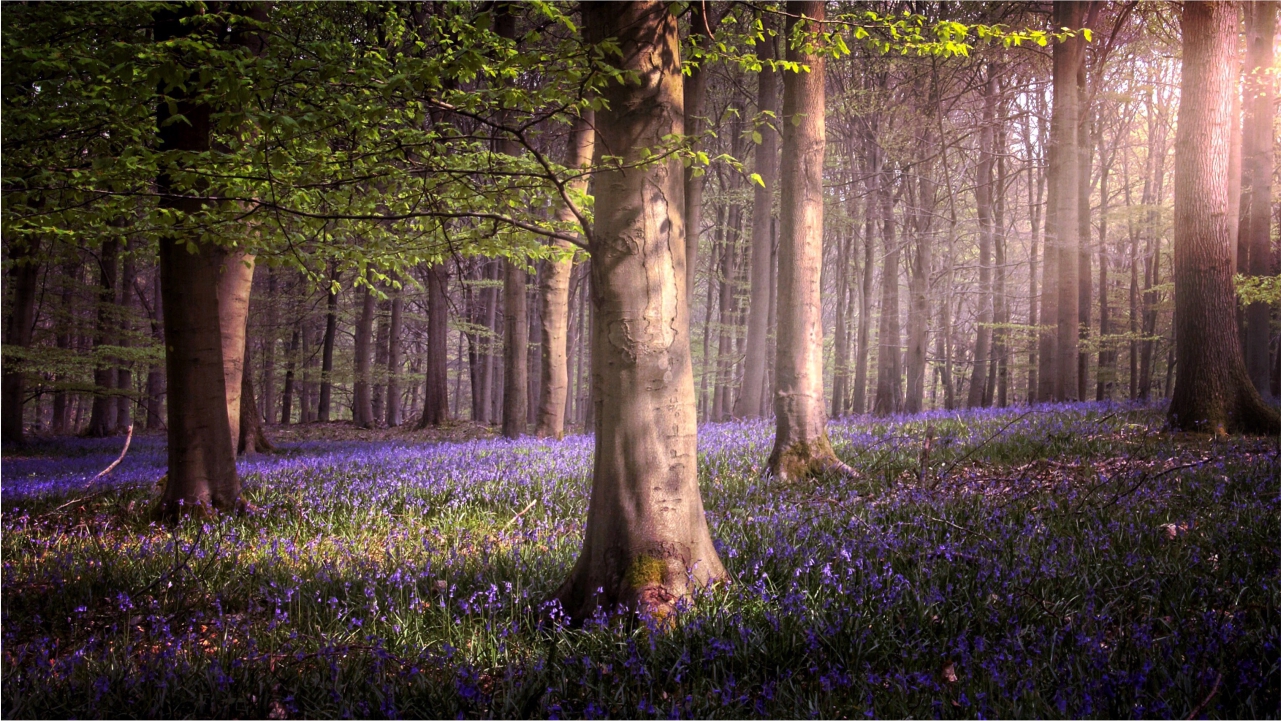
Shooting at the beginning or end of the day can be an effective way of introducing strong light into your image. The low sun as it rises or falls behind the horizon will throw atmospheric rakes of golden light into your image, which will serve to illuminate the vivid blue carpets dramatically.
Shooting in the morning can also mean that some areas, such as forests, are subject to misty conditions. The mist will always add atmosphere to an image and act as a great monotone backdrop for the striking bluebells. Just remember to shoot with as low an ISO as possible as mist and fog can tend to reveal unsightly amounts of image noise.
If you’re not a fan of early starts, then shooting under the midday sun is a good option. The midday light will actually contain more blue light than at other times of day, which is perfect for this particular subject. Additionally, the sun streaming through a forest canopy will provide a good way to diffuse the light and will provide dappled light that will be a nice aesthetic feature of the scene.
While we can often bemoan spring showers, they can work wonders for bluebell photographs. The moments after rainfall can help emphasise the strong colours of a nature location – the greens will be especially verdant, and the bluebells will perk up, giving you a healthy-looking scene. If you’re shooting macro images, then water droplets clinging to the leaves will add an extra aesthetic dimension to your bluebell subject.

Tip 4 - Composition (07:44)
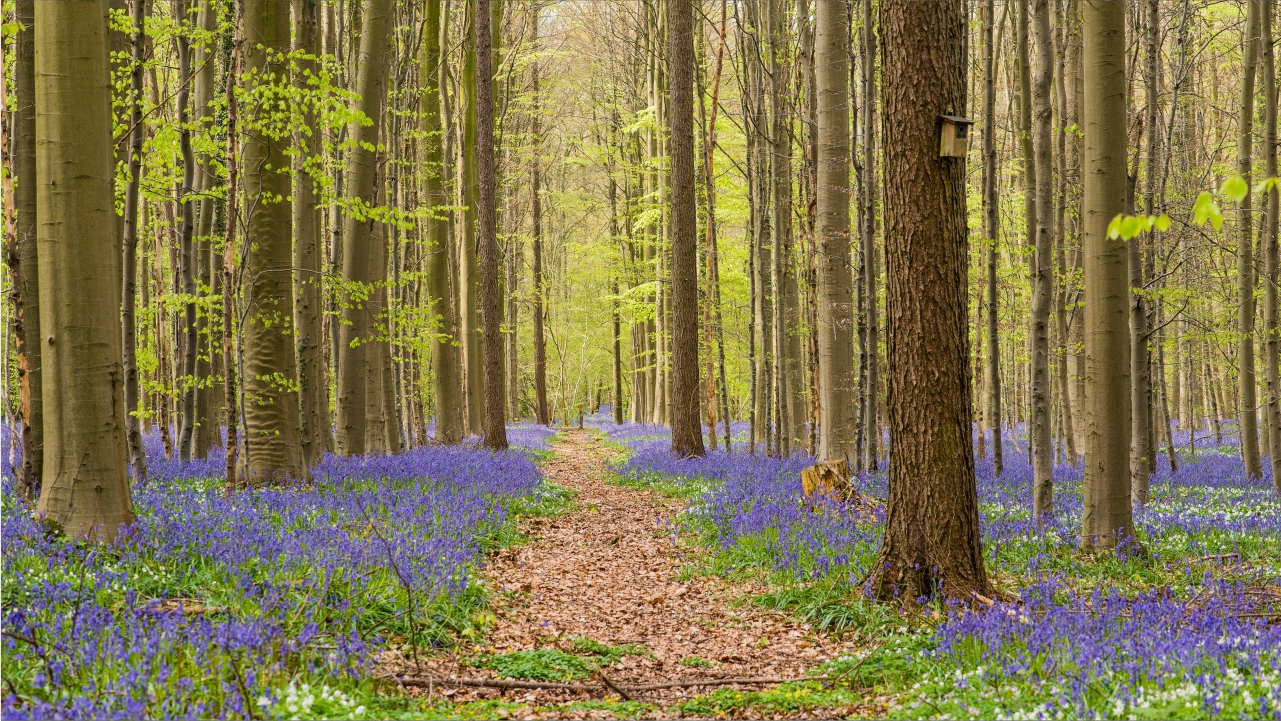
When it comes to composition and bluebell photography, the same composition rules apply to the rest of the photography. Paths are numerous throughout these areas, so there’s an opportunity for leading lines. And, of course, the tried and tested rule of thirds is going to be of great benefit to you in such visually busy scenes.
It's important to remember that rogue branches, fallen leaves, and gnarly twigs on the ground can all be hugely distracting in an image. Be conscious of your scene and take some minutes to observe the location before pressing the shutter. If there are distracting elements from one angle, move around and try another. If it simply isn’t working, know when to walk away and find another location nearby.
Tip 4 - Shooting (08:38)
Placing your camera at head height will give you the clearest view of the bluebell carpet. This will give your image ample room to include lots of foreground, middle-ground and background and, in conjunction with a wide-angle lens, will give you a good epic sweep of the location.
We so often see images looking down on bluebells, making them look like delicate subjects. But getting low to the ground and the level of the flowers can render them a dominant and powerful subject within the frame. You could try lying on the ground and angling up at the bluebells using a fisheye lens. This will stand out amongst the crowd of bluebell images and be a thoroughly unconventional approach to the subject.
Tip 5 - Final tips (10:37)
Bluebell woods can be contrasty locations as the sun streams through the tree canopy, so you’ll likely need to experiment with your exposure. Bracket your exposures to give yourself some options. Be sure to keep an eye on your histogram and ensure neither the highlights nor lowlights are clipped.
As your image lives and dies by the colour of its bluebells, you need to make sure you have options if your image out of the camera doesn’t quite represent the image you saw in front of you. It could be that you set the wrong white balance or that your exposure isn’t doing justice to the scene. Shooting in raw will ensure you are covered if you need to work on your image later.
The End
That's it for today, but if you need any help, make sure to contact us directly, and we will do our best to help.
#StaySafe - Jakub Bors
@CleverPhotographer | @BorsPhotography

