Top 5 Editing Techniques Every Luminar Neo Beginner Should Know
Nov 06, 2025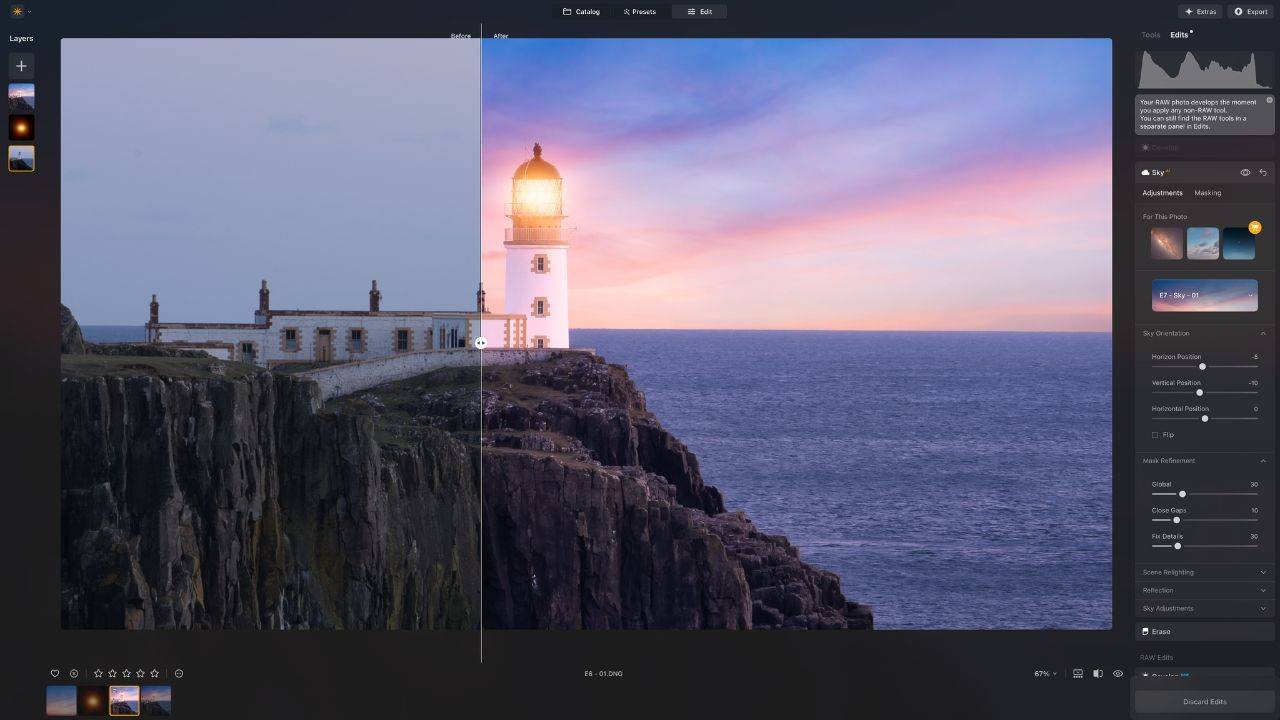
By Jakub Bors, Professional Landscape Photographer & Luminar Neo Ambassador
When you first open Luminar Neo, it’s easy to feel a bit overwhelmed. There are so many tools, sliders, and creative options. Where do you even start? Don’t worry, every photographer begins somewhere. Over the years, I’ve tested and taught Luminar Neo to thousands of users, and I’ve noticed that mastering just a few key editing techniques can make a huge difference.
In this post, I’ll share five essential editing techniques every Luminar Neo beginner should know. These techniques will help you edit faster, achieve more professional-looking results, and start building confidence in your post-processing workflow.
1. Start with Develop Raw for Essential Adjustments
If you’re editing a RAW file, your first stop should always be the Develop Raw tool. This is where you lay the foundation for your photo.
Here’s what to focus on:
-
Exposure: Adjust the brightness of your overall image.
-
Highlights and Shadows: Bring back details in bright skies or dark foregrounds.
-
White Balance: Make sure the colors look natural and balanced.
-
Clarity & Structure: Add just a touch to enhance texture, but don’t overdo it.
Think of this step as the digital equivalent of adjusting your camera settings after the shot. It sets the stage for all the creative edits that come later.
💡 Pro Tip: If you’re new to RAW editing, check out our free Luminar NEO Tools A–Z Cheat Sheet. It includes a quick summary of every essential tool, including Develop Raw, plus bonus tips on masking and blend modes. 👉 Download the free Luminar NEO Tools A–Z Cheat Sheet here
2. Use Enhance AI to Quickly Improve Your Photo
When I teach workshops, this is often the first tool that makes people say “wow.” The Enhance AI tool analyzes your image and applies smart adjustments using artificial intelligence.
It includes two main sliders:
-
Accent AI: Balances exposure, contrast, color, and tone in one go.
-
Sky Enhancer AI: Detects and improves the sky without affecting the rest of the photo.
For beginners, Enhance AI is like having a one-click assistant that brings your image to life. It’s a perfect starting point before diving into more detailed adjustments.
💡 Try this: Apply Accent AI around 30–40% and Sky Enhancer AI around 20% for natural results.
3. Master Masking for Selective Edits
Luminar Neo’s masking tools are incredibly powerful and easy to use, and they can take your editing from average to professional in seconds.
For example:
-
Use Linear Gradient Mask to darken the sky and add depth.
-
Use Radial Gradient Mask to draw attention to your subject.
-
Try Mask AI to automatically detect objects like people, skies, or buildings, then apply edits selectively to each area.
This technique helps you control where your adjustments apply, creating balanced and realistic results.
💡 Pro Tip: If you’re unsure how masking interacts with different blend modes, you’ll find a handy visual guide in the Luminar NEO Tools A–Z Cheat Sheet. It makes complex tools much easier to understand. 👉 Download the free Luminar NEO Tools A–Z Cheat Sheet here
4. Use Color and Tone Tools to Create Mood
Once your basic edits are done, it’s time to make your photo feel the way you want it to.
Here are three tools that make a big difference:
-
Color Tool: Adjust saturation and vibrance to make colors pop.
-
HSL Tool: Fine-tune specific colors; for example, make skies deeper blue or grass more golden.
-
Color Harmony Tool : Add contrast and warmth for a polished finish.
Experiment with these tools to define your own style. Over time, you’ll learn how color grading can completely transform the emotion of an image.
💡 Want to explore color faster? Our Luminar NEO Essential Preset Bundle includes 390 ready-to-use presets for Luminar Neo. They’re perfect for experimenting with different moods, tones, and color styles. They are also a great shortcut for beginners learning color grading.
5. Explore Transformation and Creative Possibilities
One of the most exciting parts of Luminar Neo is how easily you can transform a photo, not just adjust it. Beyond simple corrections, the software opens endless creative doors.
Try these tools and techniques:
-
Sky AI: Instantly replace a dull sky with something dramatic or dreamy.
-
Relight AI: Adjust lighting depth and atmosphere, especially useful for uneven exposure.
-
Structure AI and Details: Bring subtle texture and definition to your image.
-
Overlays and Textures: Add creative layers like light leaks, fog, bokeh, or artistic effects.
This is where you can really make your image your own. Whether you’re creating a realistic transformation or something more artistic, Luminar Neo gives you the freedom to experiment and have fun with your edits.
💡 Inspiration Tip: Explore the Luminar Neo Power Bundle, which includes hundreds of professional skies, overlays, and textures, perfect for discovering new creative possibilities.
Final Thoughts
Editing in Luminar Neo doesn’t have to be complicated. Once you master these five techniques — Develop Raw, Enhance AI, Masking, Color & Tone, and Creative Transformation — you’ll have everything you need to turn ordinary photos into stunning images.
Take it step by step, practice regularly, and don’t be afraid to experiment. The more you play with these tools, the faster you’ll discover your own editing style.
If you’d like a shortcut to understanding Luminar Neo from top to bottom, download my free Luminar NEO Tools A–Z Cheat Sheet. It’s a beautifully simple PDF that explains every Luminar Neo tool in plain language, with bonus tips on masking and blend modes. It is designed to help you edit faster and with confidence. 👉 Download the free Luminar NEO Tools A–Z Cheat Sheet here
Happy editing!
— Jakub Bors